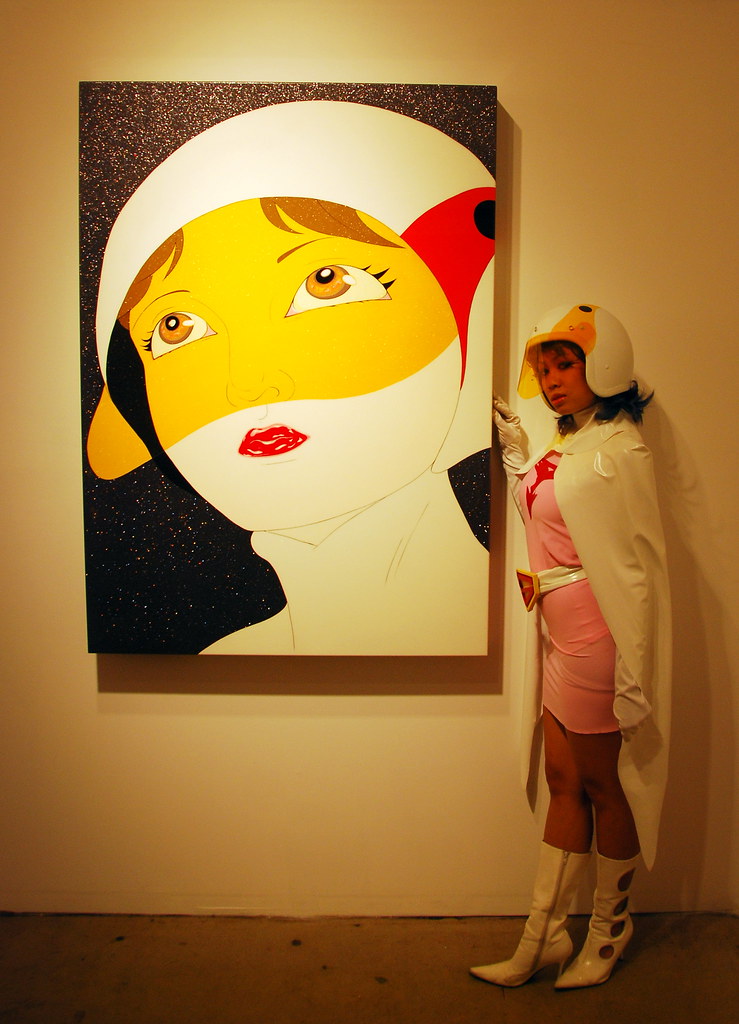
My other professional venture outside of Chubby Bunny is Bubble Punch, and we were recently invited to host a cosplay contest over at LeBasse Projects for the opening of Yoshitaka Amano's "Deva Loka" collection.
Mybusiness partner, True Mee, and I needed to dress up in Amano-inspired outfits for the event, so I broke my nearly 5 year long run of cosplay-avoidance and jumped back into the spirit of things, haha... (for those who don't know, I cosplayed A LOT back in college).
I ended up going as Jun from Gatachaman (or G-Force, as it was called in States), since she is featured in one of the paintings shown at the "Deva Loka" installation at the gallery right now.


The outfit itself was easy. I used leftover white vinyl and threw together a cape and boned collar in about an hour. The dress I made from pink spandex I got from my good friend, and Chubby Bunny helper, Jenny. In a fit of laziness, I simply sewed a tube, sewed across the top, and cut out a space for my arms and head, hahaha. GHETTO! The Gatchaman logo I stuck onto my chest with spray adhesive right before we left the house.
For the belt, I got really lucky, and one of my coworkers informed me that she had 5 of them laying around she ordered from cosplay.com a few years ago from a Gatchaman cosplay group that never ended up happening! SCORE! I made the belt out of white vinyl, and made a pouch for my cell phone, and another one for business cards! VERY IMPORTANT! I hate having bags that don't match my costume in pictures, so I always try to sew in some sort of pouch into all of my costumes, or make a matching purse.
The helmet was the only thing I really stressed about, because I didn't know how to pull it off. In retrospect, I really should have just sewed a hood using white vinyl, like the other girl who showed up in the same costume as me, haha.
But I really liked the helmet idea, so I called around EVERYWHERE looking for one...
I ended up finding the perfect helmet at one of my favorite stores for costume stuff: Robinson Beautilities. They had a whole back room of army surplus and some old police uniform items, so I hooked myself up with an old fashioned police helmet, and even negotiated a discount with the manager! Usually they only rent out costumes they have in the back, but if you like to barter, you can get a really good price on some of their older costume items!
Short tutorial of how I changed the dirty black and white helmet into the Jun helmet:
Here's how it came:
I used painter's tape and a plastic bag to block off the inside of the helmet, and then spray painted the entire thing white. It took about 3 or 4 coats until the black wasn't visible and the color was pretty even. I just used a generic OSH brand semi-gloss spray paint, about $3.
Then I cut patterns for the "eyes" and traced them on both sides of the helmet with a pencil, flipping the pattern piece to get the exact mirror image for the other side. Then I painted in with some yellow, orange paint-- about 4 layers to get the right opaqueness, and did black circles inside.
For the visor, I bought a gel (sheet of colored plastic used for changing lighting colors) from Samy's Camera in Culver City, for about $7. It's flexible and very easy to work with. It can get wrinkled though, if you crush it, so make sure not to put anything on top of it, or accidentally step on it o.0
I laid a piece of newspaper onto the brim of the helmet and curved it around to create a pattern for the visor, making sure that it extended up at either end so I could attach it with screws directly into the helmet. (the holes were pre-drilled). To get it perfectly symmetrical, i folded the paper in half first, lined up crease with the center of the helmet, and traced where I wanted to cut directly onto the paper on the right side. Then, I took the paper off, refolded it, and cut out both halves to match the one side.
Then I taped the pattern to the gel, and cut out the brim.
I attached the brim/ visor by putting in a washer and a screw into either side. I later painted over the metal parts with the orange paint so it wasn't as visible as in the picture below.
When I got dress, I tossed on some super long eyelashes, wore very baby pink lipstick, and gave myself on-purpose helmet hair by curling my hair flipped out. I flipped my bangs up, also, so they would curl around the brim of the helmet.
And here is the end result!
More photos later :)


