Tuesday, March 2, 2010

Shirley Manson & Elijah Wood For Oliver Peoples Eyewear


Very cute video but... the film quality looks a little off? Oh Shirley Manson, what have you been up to? Your enormous and glorious hair makes Elijah look a little bit like a hobbit, still, I fear.

Do watch!

DIY: How to be the best girlfriend ever. Baked Eggs and Ai no Bento!

Will's birthday was last Wednesday, so I woke up bright and early to prepare him a lovely breakfast in bed, and also to make him a super fun bento :)


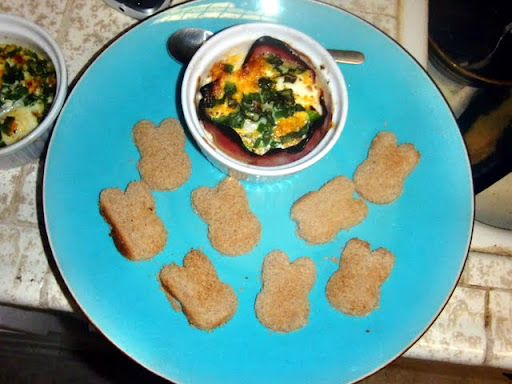
DIY: How to Breakfast! Baked Eggs with Bunny Toast

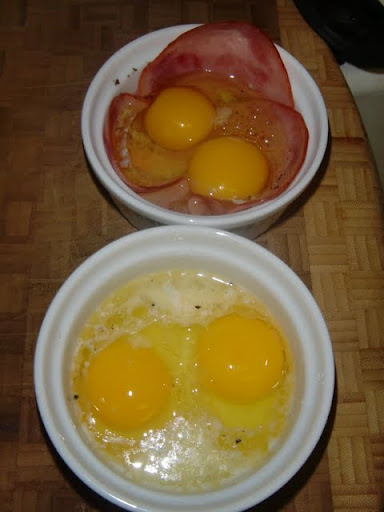
1) Get two ramekins, and put in about 1/2 a tblspoon of butter and 1 tablespoon of milk or cream in each/ put in the broiler and let melt. Take ramekins out of broiler. Then, place 2 eggs in each. If you're a ham lover, put in 2 pieces of lunch meat ham at the bottom of the ramekin before putting in the egg. Add a bit of salt and pepper.


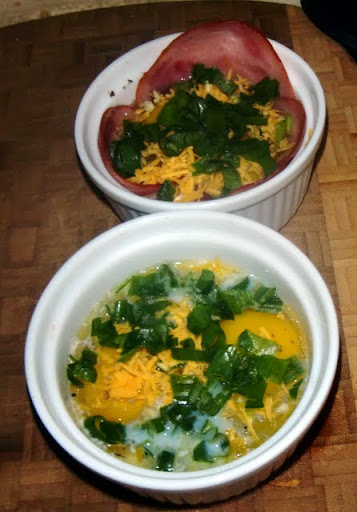
2) Top the eggs with your choice of thyme, rosemary, oregano, cheese (I used mild cheddar), and lots of green onion. Place the ramekins back in the broiler for 15 to 25 minutes, until yolks are slightly firm


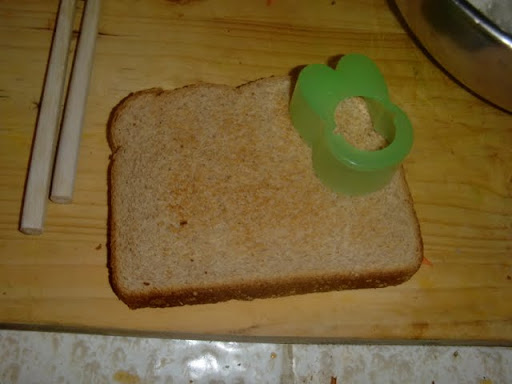
3) While ramekins are in the broiler, toast some bread. You can take any shape cookie cutter to make cute shapes once the toast is ready. I made some small bunny bread bites!


4) When eggs are done, take out of broiler, and let sit for 3 minutes. Place on a plate with the toast bites, and service! ta da!


Picture #15
DIY: 愛の弁当の作り方! How to Ai no Bento! (Love Bento!)

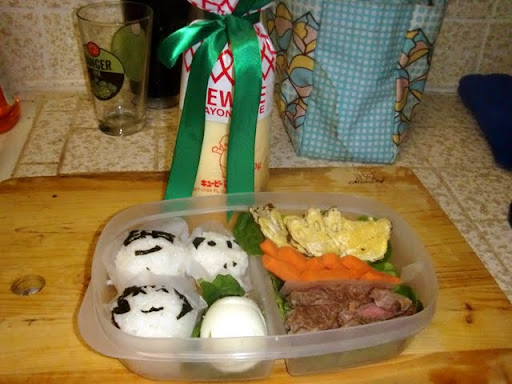
1) Steal flat-ish tupperware from roommate. Hope he doesn't notice. Line one side with lettuce or spinach. For the other side, I prepped "containers" for the onigiri using round pieces of wax paper that I taped the sides up of. You can also use cupcake papers for this, I was just too cheap to buy them hehe.


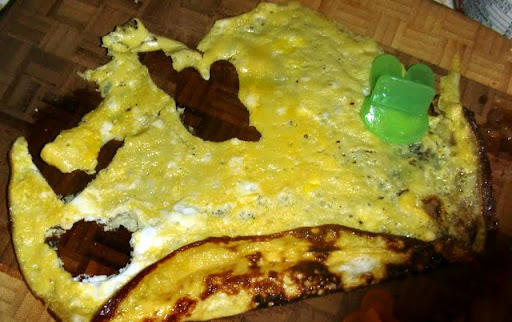
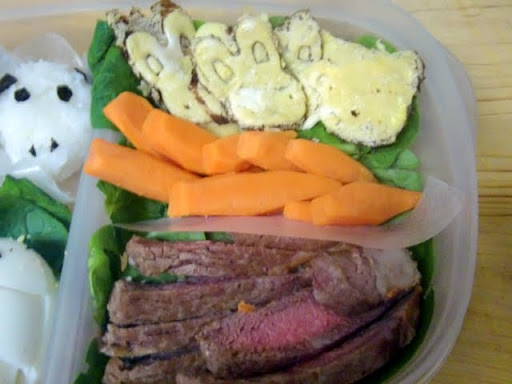
2) Prepare omelette: I made Japanese-style sweet omlettes, which is simply 1 egg, 1 tablespoon of dashi, and 2 teaspoons of sugar whipped up and put into a pan. Usually sweet omlettes are rolled, but to make shapes, I kept it flat. (Right around this time, the broiler had set off the fire alarm, so while I was running around trying to turn it off, the eggs has cooked flat anyway haha). When soft and firm, take out of pan and place on cutting board to let cool for about 3 minutes. Then, I used bunny bread press molds and pressed bunny and bear shapes into the omlette. (yours shouldn't be QUITE as burny as this one..)


3) I had grilled some beef tenderloin the night before for dinner, so I took the leftovers and sliced them up to put in the bento. You can add any protein to the bento, though. Tiny chicken wings are a popular thing to throw in, too! I also sliced up some carrots into mini carrots. I was originally planning to put green "stalks" onto the carrots using broccoli, but I had run out of time...! If you like, you can also divide the meat and vegetables using a piece of wax paper.


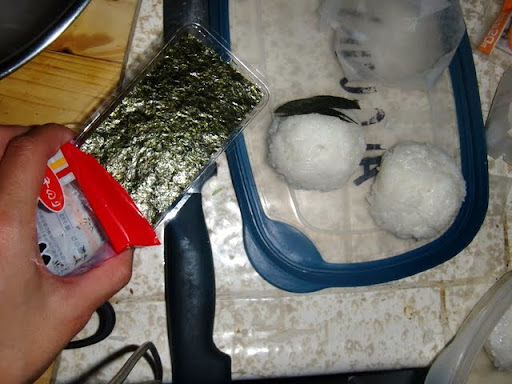
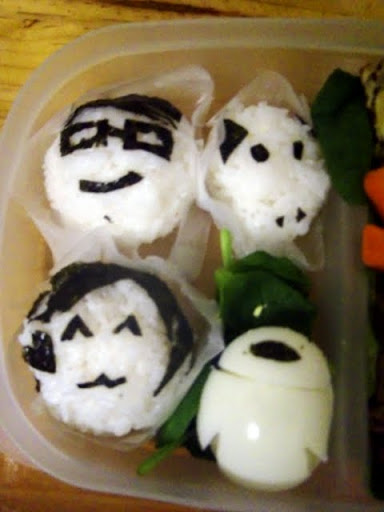
4) For the left side, I made some round onigiri to decorate. Onigiri rice is simply regular white rice, cooled, and mixed with a dash of salt, and some rice vinegar. I've seen onigiri rice prepared several different ways in my time in Japan, so pick the kind you like the best :) I mixed the rice up, then dipped my hands in a bowl of water so the rice wouldn't stick to them as I grabbed the rice. Next, I grabbed a fistful of rice and packed it into a small ball. I made 3 to make our "family." I decorated the onirigi using dry seaweed that I cut up using plain kitchen scissors (make sure they are dry!) I made an onigiri tha tlooked like Will, me, and our guinea pig, Niblet.


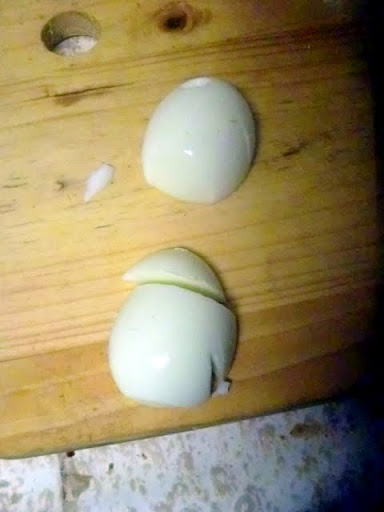
5) I had the bright idea to try to make a little EVA from Wall-E out of a hard boiled egg, haha. I saw it in this other bento, and threw it in at the last minute. I boiled an egg the night before and stuck it in the fridge over night. I took it out, and sliced off the top 3rd of the egg.Then I took little chunks out under each "arm", and added an oval onto the face. The oval is just a small piece of dry seaweed. I had to wet it a little bit to get it to stick to the egg. Sooooort of ghetto, but it's the AI in the AI NO BENTO that counts!


6) Here's a pic of the onigiri and egg together!


7) and that's it! I added another piece of waxpaper on top of the bento before I closed it up so that the stuff inside wouldn't roll around too much. I also gave Will a bottle of Kewpie Mayo for his birthday haha.


The end!

Sunday, February 21, 2010

DIY: Go, Go, Gatchaman!

My other professional venture outside of Chubby Bunny is Bubble Punch, and we were recently invited to host a cosplay contest over at LeBasse Projects for the opening of Yoshitaka Amano's "Deva Loka" collection.

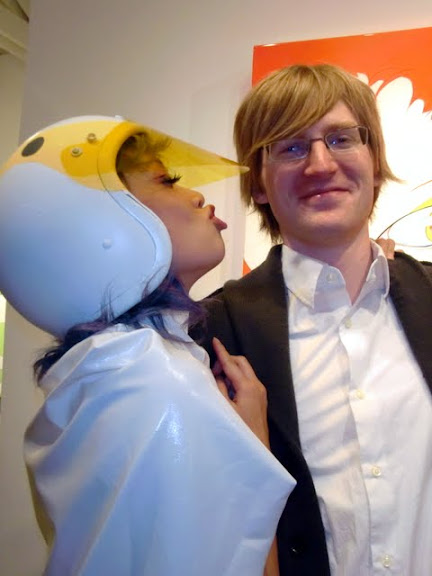
Mybusiness partner, True Mee, and I needed to dress up in Amano-inspired outfits for the event, so I broke my nearly 5 year long run of cosplay-avoidance and jumped back into the spirit of things, haha... (for those who don't know, I cosplayed A LOT back in college).

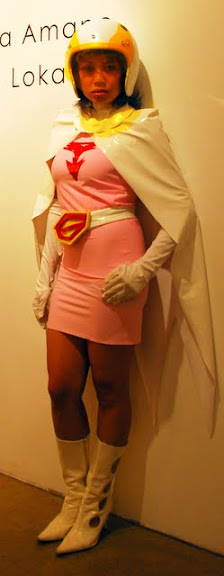
I ended up going as Jun from Gatachaman (or G-Force, as it was called in States), since she is featured in one of the paintings shown at the "Deva Loka" installation at the gallery right now.


The outfit itself was easy. I used leftover white vinyl and threw together a cape and boned collar in about an hour. The dress I made from pink spandex I got from my good friend, and Chubby Bunny helper, Jenny. In a fit of laziness, I simply sewed a tube, sewed across the top, and cut out a space for my arms and head, hahaha. GHETTO! The Gatchaman logo I stuck onto my chest with spray adhesive right before we left the house.

For the belt, I got really lucky, and one of my coworkers informed me that she had 5 of them laying around she ordered from cosplay.com a few years ago from a Gatchaman cosplay group that never ended up happening! SCORE! I made the belt out of white vinyl, and made a pouch for my cell phone, and another one for business cards! VERY IMPORTANT! I hate having bags that don't match my costume in pictures, so I always try to sew in some sort of pouch into all of my costumes, or make a matching purse.

The helmet was the only thing I really stressed about, because I didn't know how to pull it off. In retrospect, I really should have just sewed a hood using white vinyl, like the other girl who showed up in the same costume as me, haha.

But I really liked the helmet idea, so I called around EVERYWHERE looking for one...

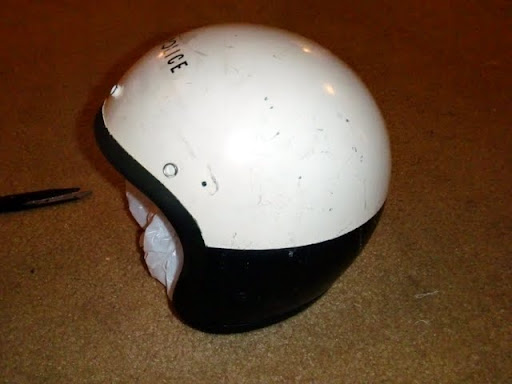
I ended up finding the perfect helmet at one of my favorite stores for costume stuff: Robinson Beautilities. They had a whole back room of army surplus and some old police uniform items, so I hooked myself up with an old fashioned police helmet, and even negotiated a discount with the manager! Usually they only rent out costumes they have in the back, but if you like to barter, you can get a really good price on some of their older costume items!

Short tutorial of how I changed the dirty black and white helmet into the Jun helmet:

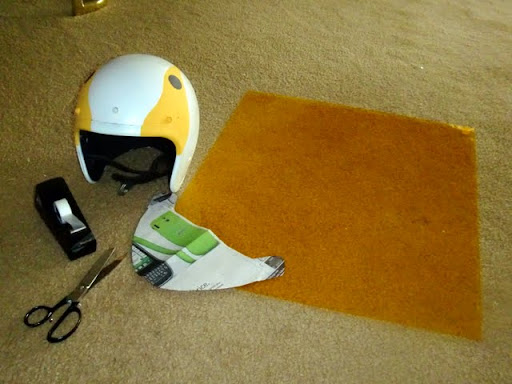
Here's how it came:


I used painter's tape and a plastic bag to block off the inside of the helmet, and then spray painted the entire thing white. It took about 3 or 4 coats until the black wasn't visible and the color was pretty even. I just used a generic OSH brand semi-gloss spray paint, about $3.

Then I cut patterns for the "eyes" and traced them on both sides of the helmet with a pencil, flipping the pattern piece to get the exact mirror image for the other side. Then I painted in with some yellow, orange paint-- about 4 layers to get the right opaqueness, and did black circles inside.

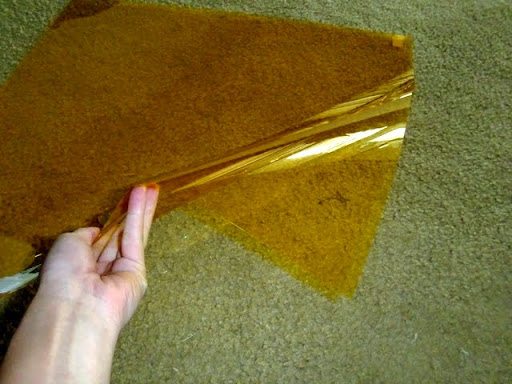
For the visor, I bought a gel (sheet of colored plastic used for changing lighting colors) from Samy's Camera in Culver City, for about $7. It's flexible and very easy to work with. It can get wrinkled though, if you crush it, so make sure not to put anything on top of it, or accidentally step on it o.0


I laid a piece of newspaper onto the brim of the helmet and curved it around to create a pattern for the visor, making sure that it extended up at either end so I could attach it with screws directly into the helmet. (the holes were pre-drilled). To get it perfectly symmetrical, i folded the paper in half first, lined up crease with the center of the helmet, and traced where I wanted to cut directly onto the paper on the right side. Then, I took the paper off, refolded it, and cut out both halves to match the one side.


Then I taped the pattern to the gel, and cut out the brim.

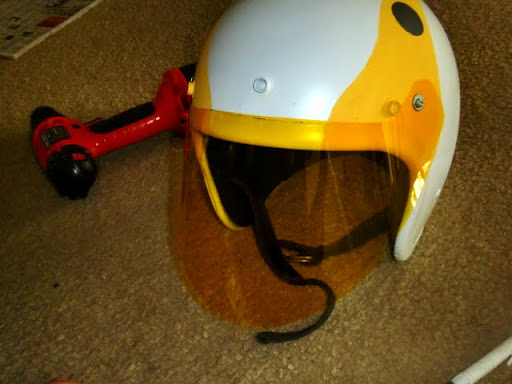
I attached the brim/ visor by putting in a washer and a screw into either side. I later painted over the metal parts with the orange paint so it wasn't as visible as in the picture below.


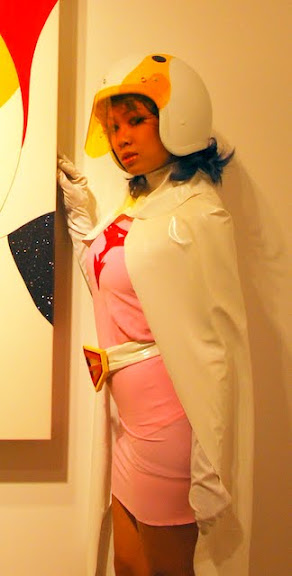
When I got dress, I tossed on some super long eyelashes, wore very baby pink lipstick, and gave myself on-purpose helmet hair by curling my hair flipped out. I flipped my bangs up, also, so they would curl around the brim of the helmet.

And here is the end result!


More photos later :)

Saturday, February 13, 2010

More Fall 2010 RTW lovelies..

Hemming and hawwing over these great looks!

Lacoste Fall 2010 Ready to Wear
FANTASTIC hats! Also, I'm a big fan of color blocking like this... lots of solid color on one area of the body... I dress like this a lot actually. But god, I really want this hat!


Cushnie et Ochs Fall 2010 Ready To Wear
I love me some good cowl action.... She reminds me of someone from Star Wars? I like looking like an alien sometimes in my everyday wear, so maybe that's why I'm so attracted to this... haha..

Friday, February 12, 2010

Already dreaming of Fall 2010

Taking a look at some of the Fall 2010 stuff has got me feeling very... goth! Just a few picks from what I was browsing through this afternoon...

L.A.M.B. Fall 2010 Ready to Wear
A lot of things in this collection are very similar to some Westwood blazers we've already seen before. I do like her take on the mini bolero and the BELTS-ALL-OVER-THE-PLACE method! (Anyone else here remember Lulu from FF? haha..)


Cynthia Steffe Fall 2010 Ready to Wear

Very, VERY school girly-y! I really liked this simple combo. School girl chic with a tough looking jacket and Tom Cruise-y sunglasses to roughen it up.

I am Chubby Bunny blog!

Hey everyone! I've moved over here from my old Michelle Monster blog, so please update your bookmarks!

This journal will be dedicated to my Chubby Bunny lifestyles, as well as provide insight on my designs and projects for Chubby Bunny accessories!

Please check it out!

Wednesday, September 2, 2009

Summer Smacks.


Summers in Los Angeles are weird.

Growing up in good ‘ol Pittsburgh, where we have 4 seasons (a normal fact that of my students in Japan regularly questioned me about… do their textbooks all say we live in the Sahara???), we have a rainy and miserable spring around April, then slowly transition to summer weather by mid-June, complete with humidity, summer showers, and sunburned sweaty necks populating the city.

In LA, at least the part of it I live in, you spend most of the “summer months” of June through mid-July, in a warm, but comfortable state, sometimes wearing jeans, sometimes shorts, but not feeling a distinct urge for either. Occasionally you’ll have a bubble of heat pass over your local area, and you’ll gripe about not having a proper fan yet.

(Side note: I currently own ONE fan which has the following defects: 1) I found in the dumpster and taped back together since the entire outer shell was shattered 2) is a window ban, but doesn't actually fit in my window 3) makes loud rattling sound, since I have propped it up on the ironing board next to the window, and eventually shakes itself off, causing it to break into more pieces.)

Then, suddenly, true “summer” gives you a little smack in the face to let you know that it is not just a myth. My apartment of late has been full of stiff, warm air, no doubt an affect of the fires blazing around here. I find that summer sneaks up on me here primarily because of the lack of humidity. The heat sort of seeps into your skin, and then, Surprise!, you find perspiration on the small of your back. This is very much unlike in Pittsburgh, where you wake up in a pool of sweat, and spend the rest of your day vaguely soaked in your own juices.

Is it weird that I somehow miss “real” summer? I certainly will have to escape this winter to the mountains for a “real” winter, which I haven’t seen in ages. FYI, “real winter” includes, and is not limited to:

1. Snow

2. Enormous coats which make you too hot in your car, too cold when you step out of it, and are cumbersome to lug around once you reach the indoors

3. Hot beverages

4. Learning how to “drift” into actual snow drifts, hoping to God a large piece of metal or giant bricks are hidden in the snow pile.

5. Eating a lot and not feeling too bad about it, because you feel that, just like a bear who is prepped for hibernating, you are simply building a seasonal layer of fat to keep out the weather.


Strange that I'm finally into summer in LA and am already reminiscing about winter.